Chef Infra Server
Overview
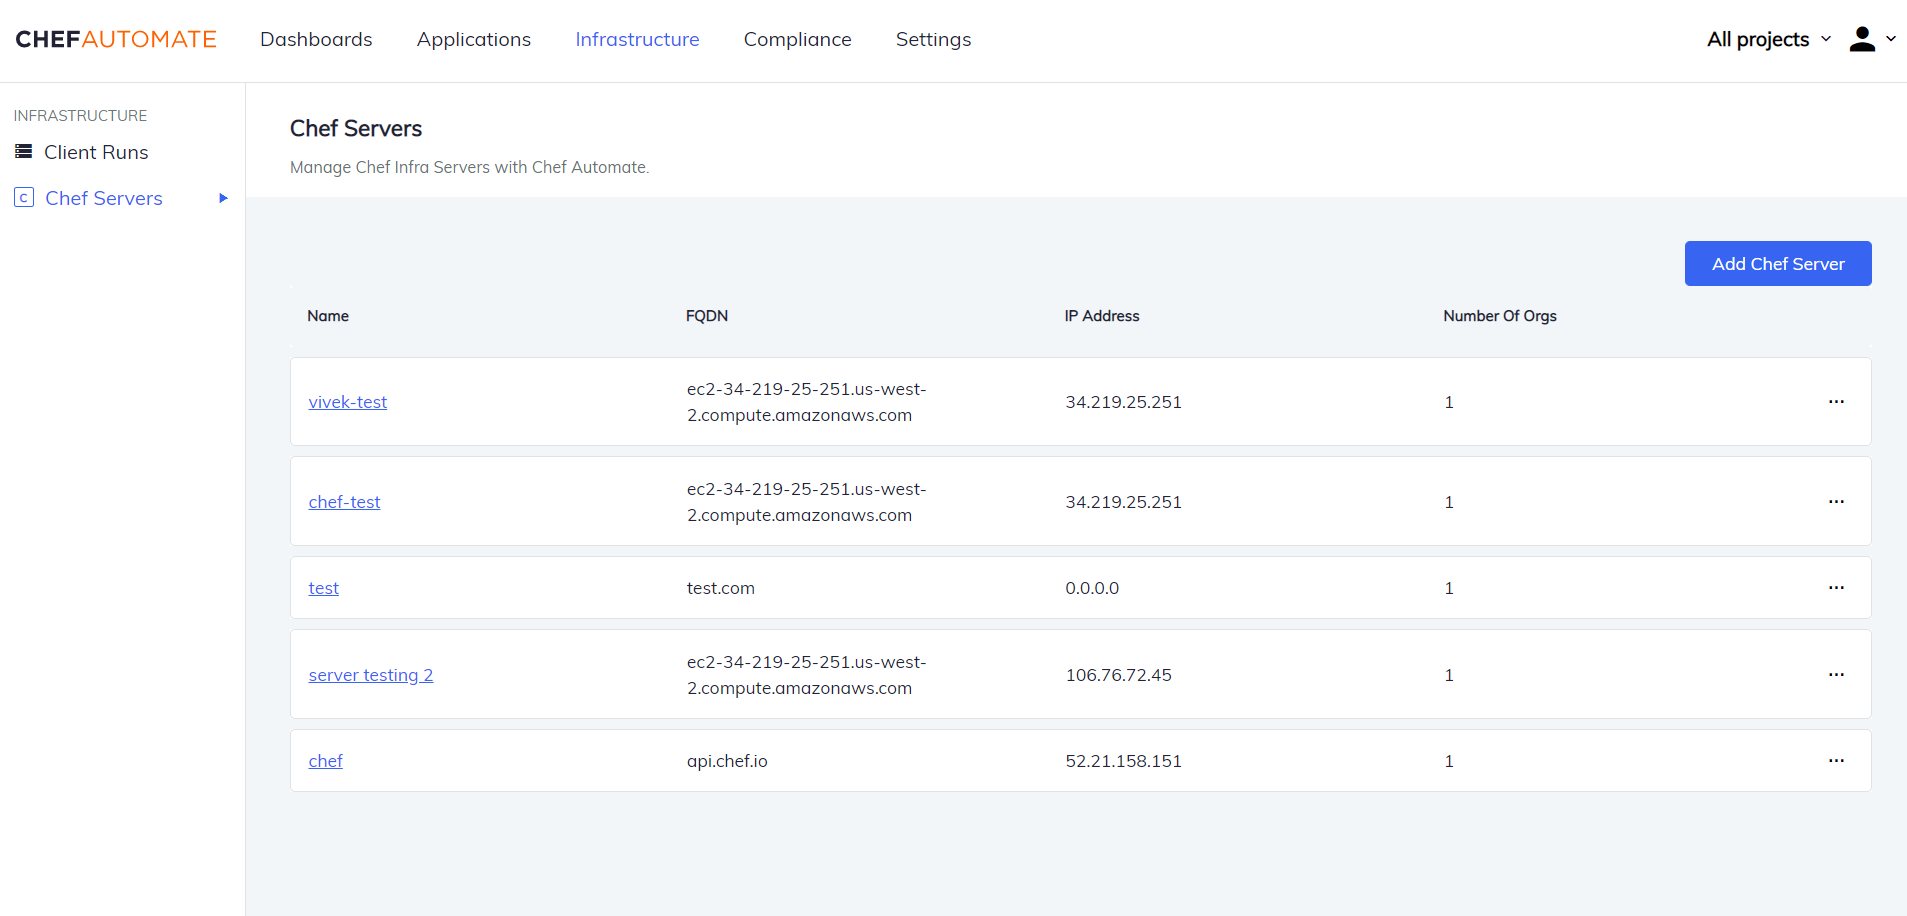
The Chef Infra Server page (Infrastructure > Chef Servers) lets you connect existing Chef Infra Servers to Chef Automate, view all of the connected Chef Infra Servers, and manage all of the objects on your connected Chef Infra Servers.
The Chef Infra Server acts as a hub for configuration data. The Chef Infra Server stores cookbooks, the policies that are applied to nodes, and metadata that describes each registered node that is being managed by Chef Infra Client.
Nodes use Chef Infra Client to ask the Chef Infra Server for configuration details, such as recipes, templates, and file distributions. Chef Infra Client then does as much of the configuration work as possible on the nodes themselves (and not on the Chef Infra Server).
This scalable approach distributes the configuration effort throughout the organization.
The objects that you can manage from the Chef Infra Server are:
- Cookbooks
- Roles
- Environments
- Data Bags
- Clients
Connect Chef Infra Servers to Chef Automate
The Chef Infra Server panel starts out with an empty list of servers.
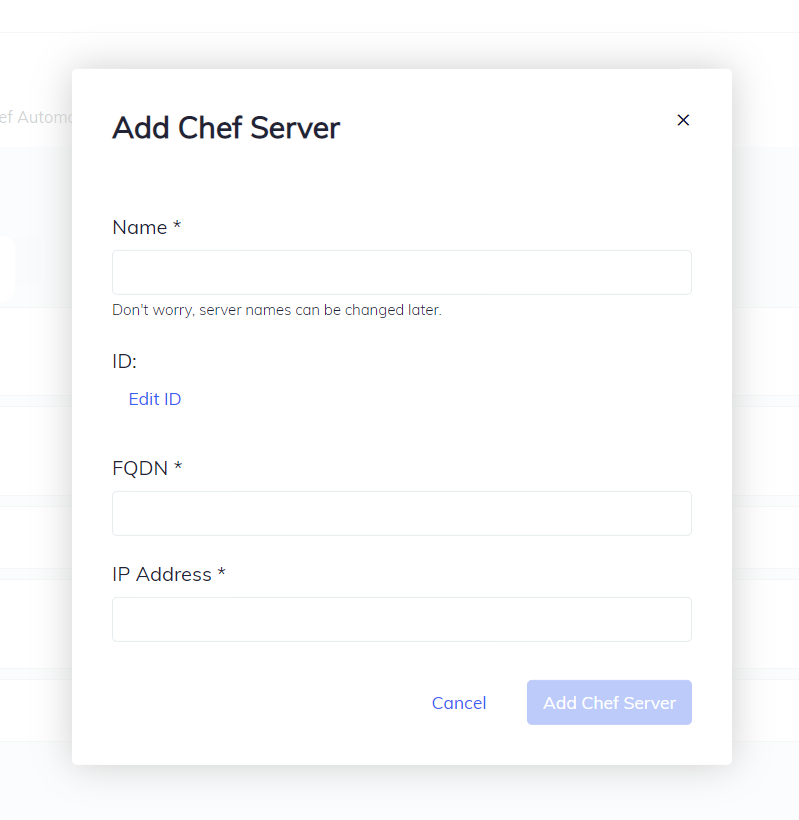
To add existing Chef Infra Servers to the Chef Automate infrastructure, select Add Chef Server which will request the name, FQDN, and IP address of your Chef Infra Server:
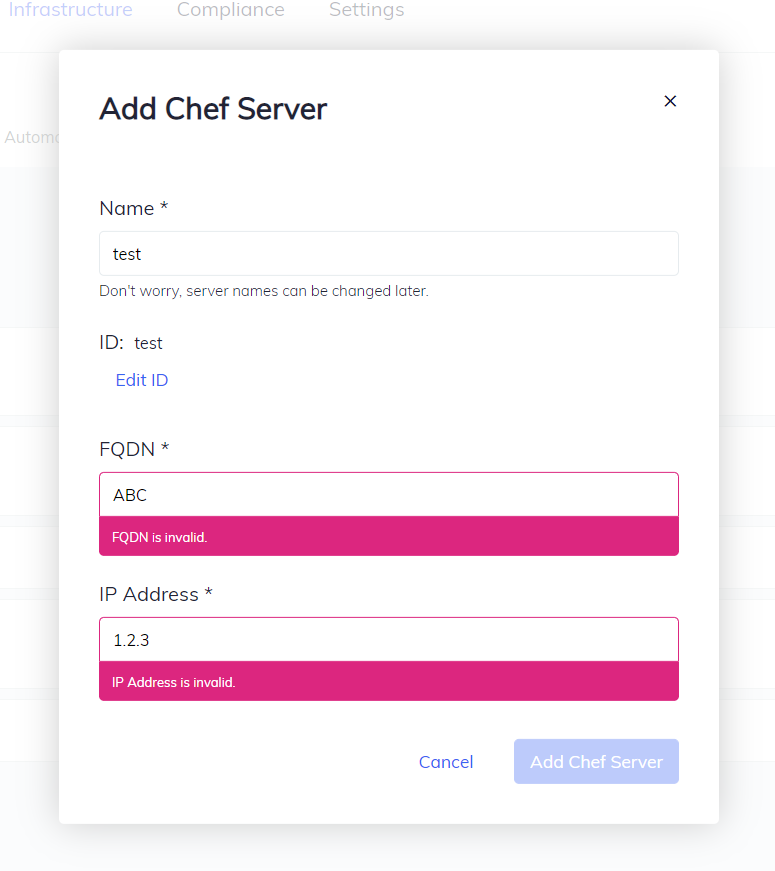
Chef Automate will warn you if you enter an invalid FQDN or IP address:
Once you are finished, select Add Chef Server and you will see your server in the list of Chef Infra Servers.
Connect a Chef Organization to a Chef Infra Server
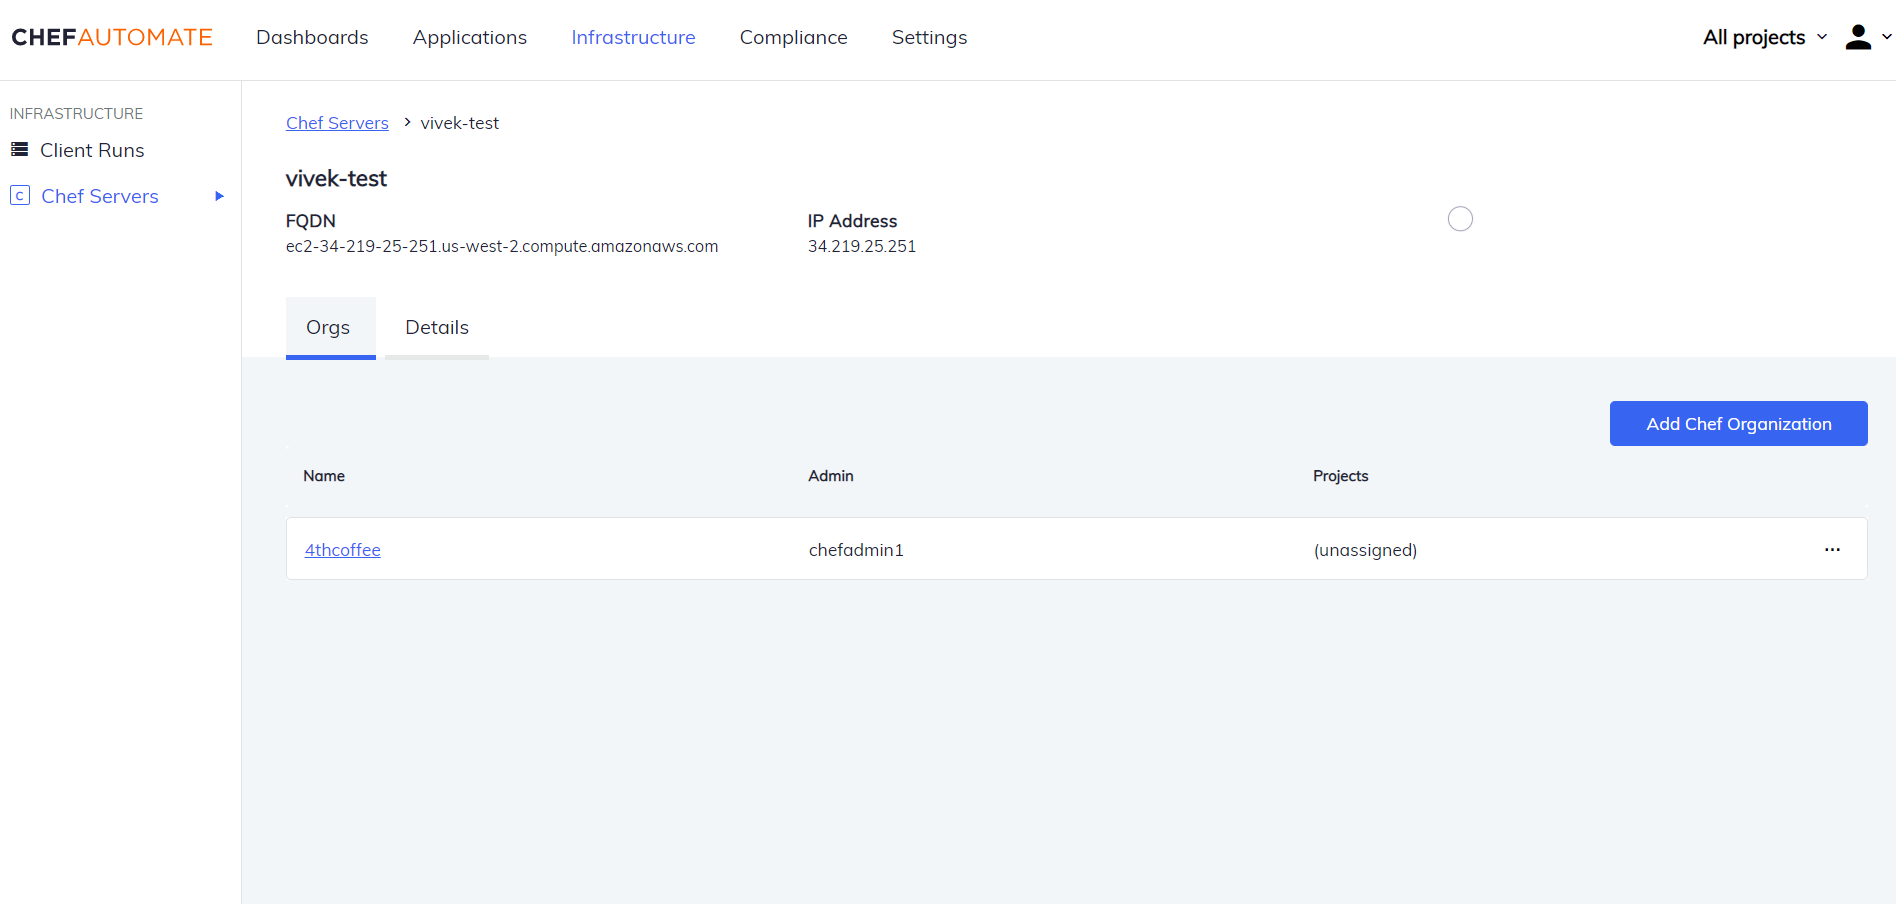
To view a list of existing organizations on a Chef Infra Server, select a Chef Infra Server from the Chef Servers list, then select the Organizations tab, as shown below:
To create a new organization, see the documentation on setting up a Chef Infra Server.
To add an existing organization, select Add Chef Organization, which opens a dialog box as shown below:
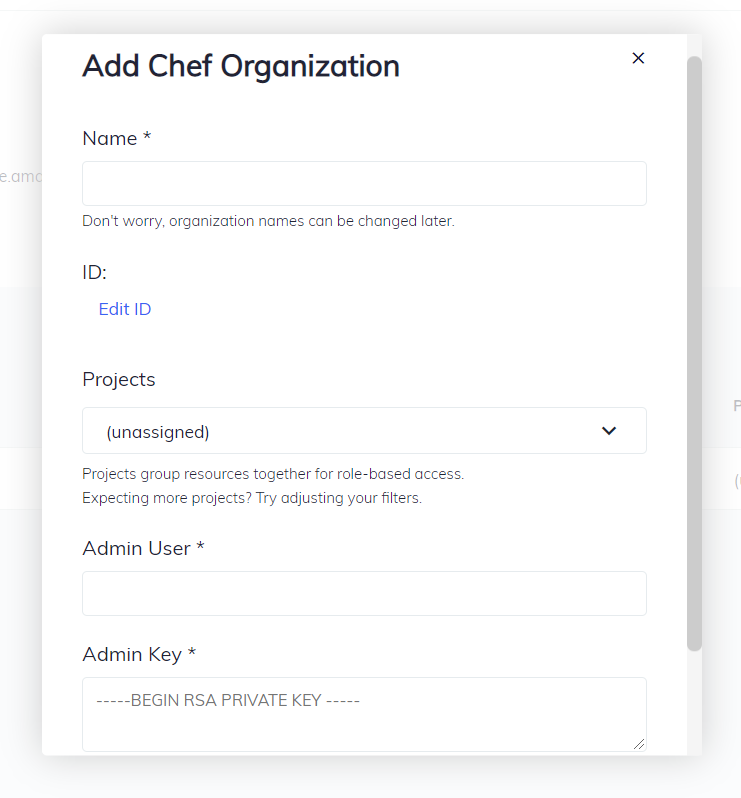
Enter the Name, Projects, Admin User, and Admin Key fields using the same values that were provided when the organization was configured using Knife.
Copy the contents of the ~/.chef/USER.pem file and paste it into the Admin Key field. Then select Add Chef Organization to add the organization to the Chef Infra Server.
Access Chef Infra Server Components
The following Chef Infra Server components for an organization can be managed using Chef Automate:
- Cookbooks
- Roles
- Environments
- Data Bags
- Clients
To access these components for an organization, select Chef Servers > Organizations and then select an organization. Refer to the image below:
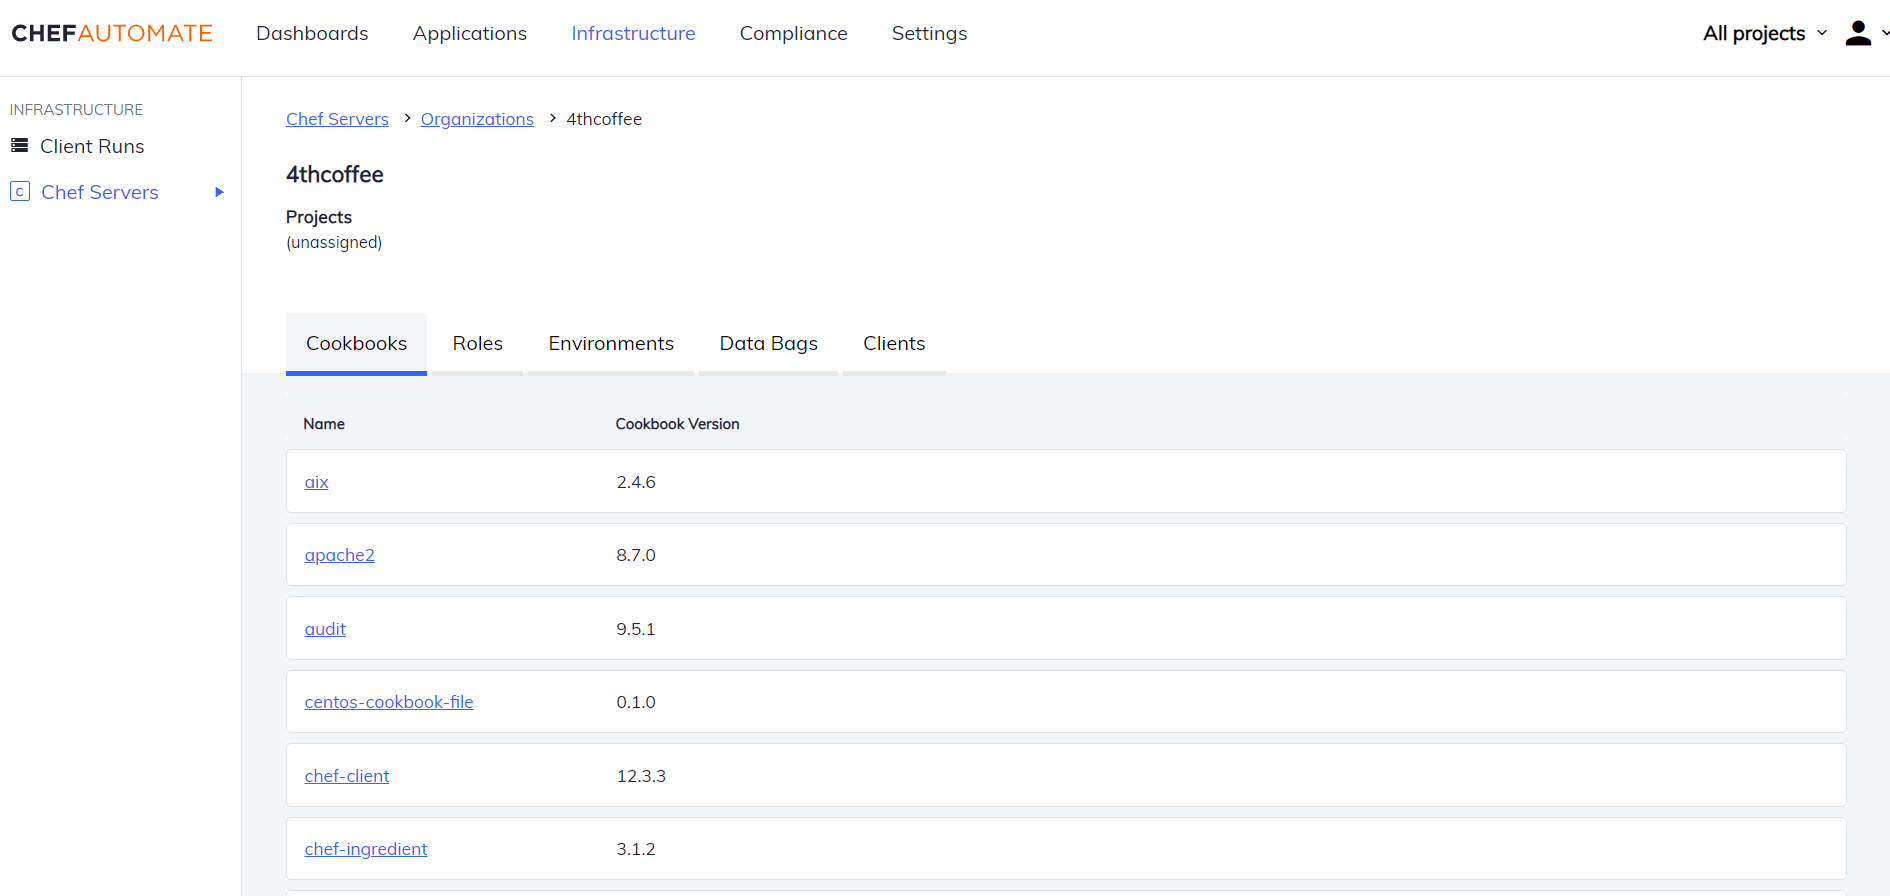
Cookbooks
A cookbook is the fundamental unit of configuration and policy distribution. A cookbook contains recipes and other files, components, or directories.
Roles
Roles let you define patterns and processes that exist across nodes in an organization as belonging to a single job function. Each role consists of zero (or more) attributes and a run-list.
Environments
An environment can be used to map an organization’s real-life workflow to what can be configured and managed when using Chef Infra. This mapping is accomplished by setting attributes and pinning cookbooks at the environment level.
The Chef Infra Server UI lets you:
- Create an environment.
- Search for a specific environment from a list of environments.
- List out all the environments at one place.
- View the details of an environment.
- Edit an environment.
- Delete an environment.
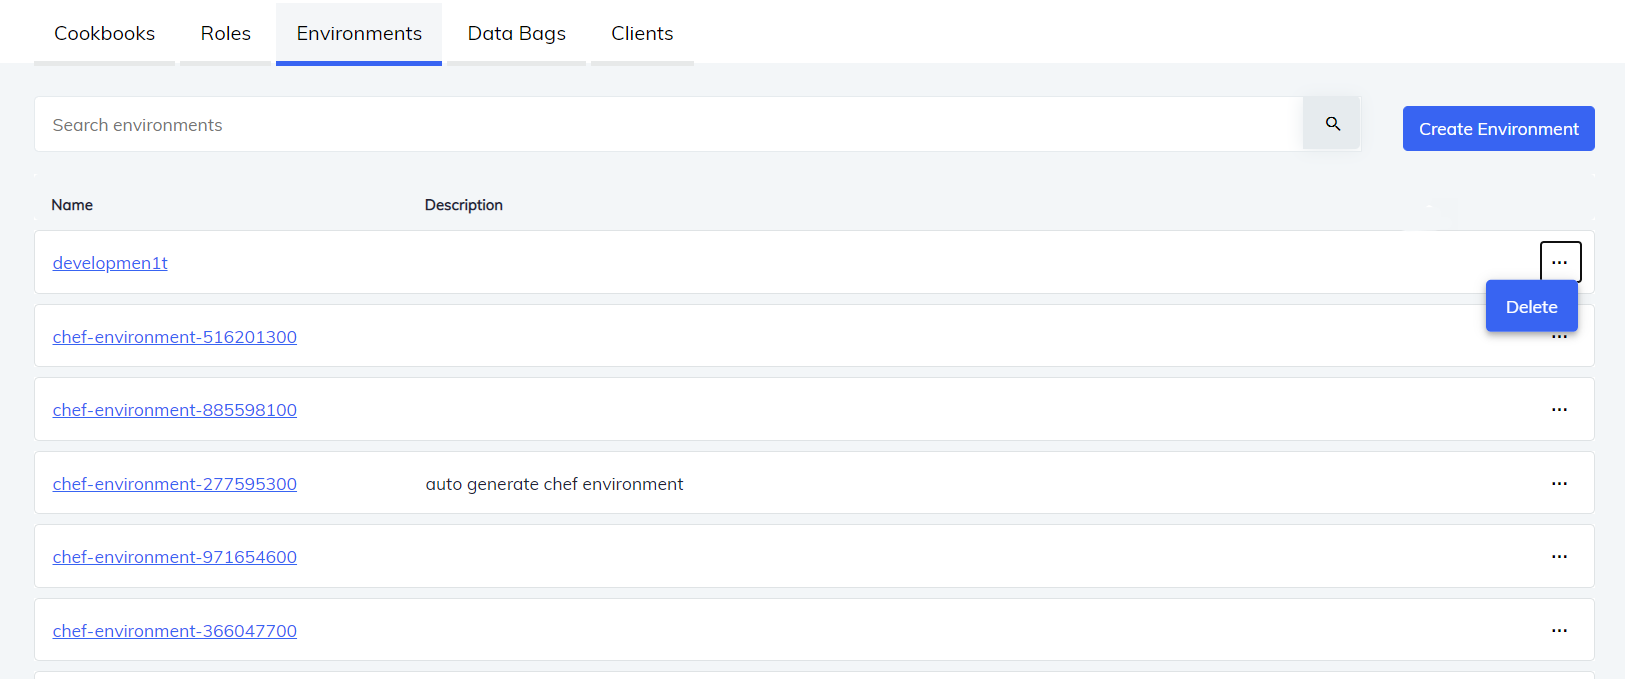
Create an Environment
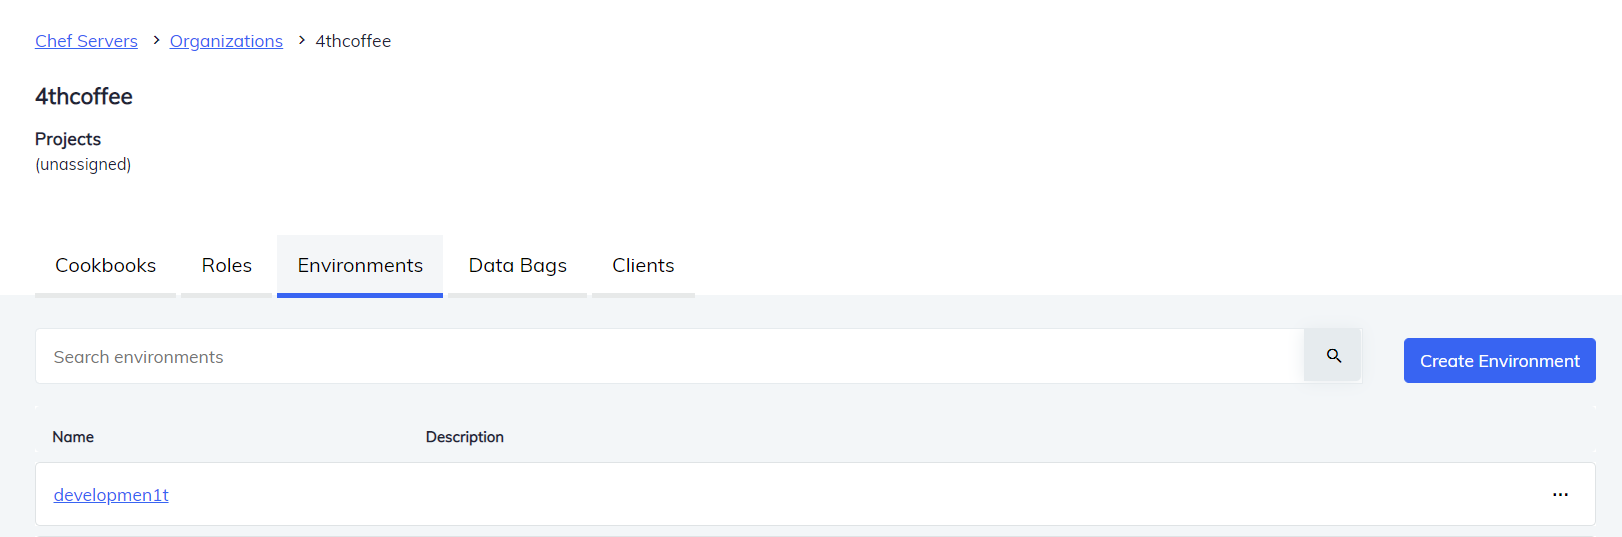
To create a new Environment, select Create Environment, as shown below:
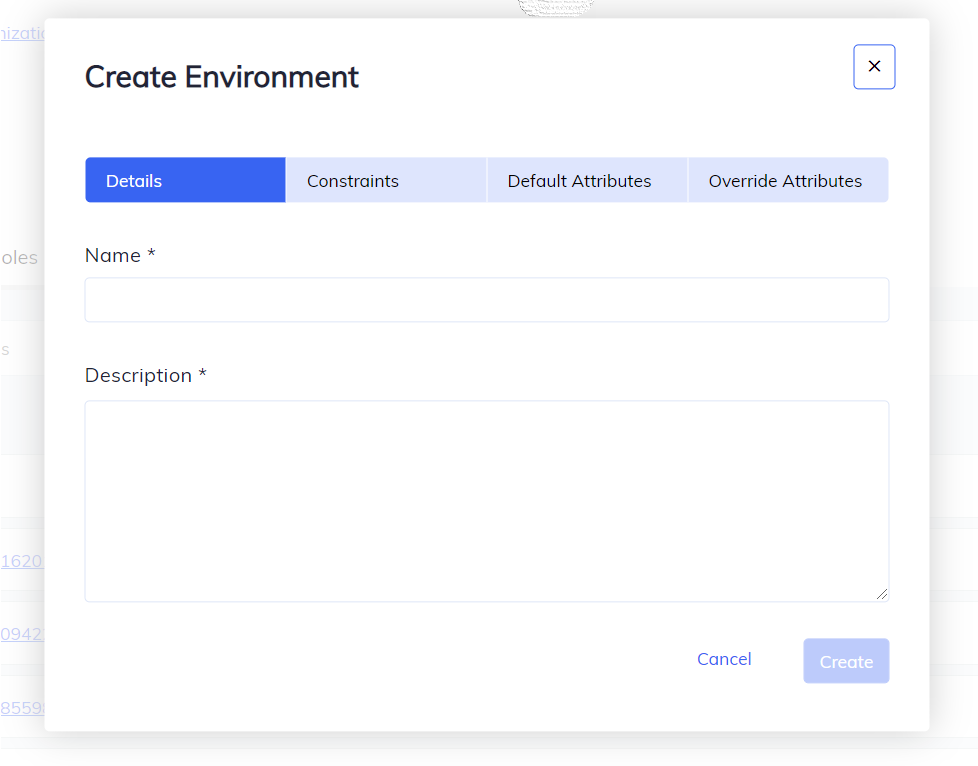
Selecting the Create Environment button opens a dialog box. The dialog box contains four different sections: Details, Constraints, Default Attributes and Override Attributes. Enter the details in the possible sections and select Create to create a new environment.
Search for an Environment
Use the Search environments bar to find an existing environment from the list of environments. Entering the name of an environment in the search box returns environments matching your search criteria.
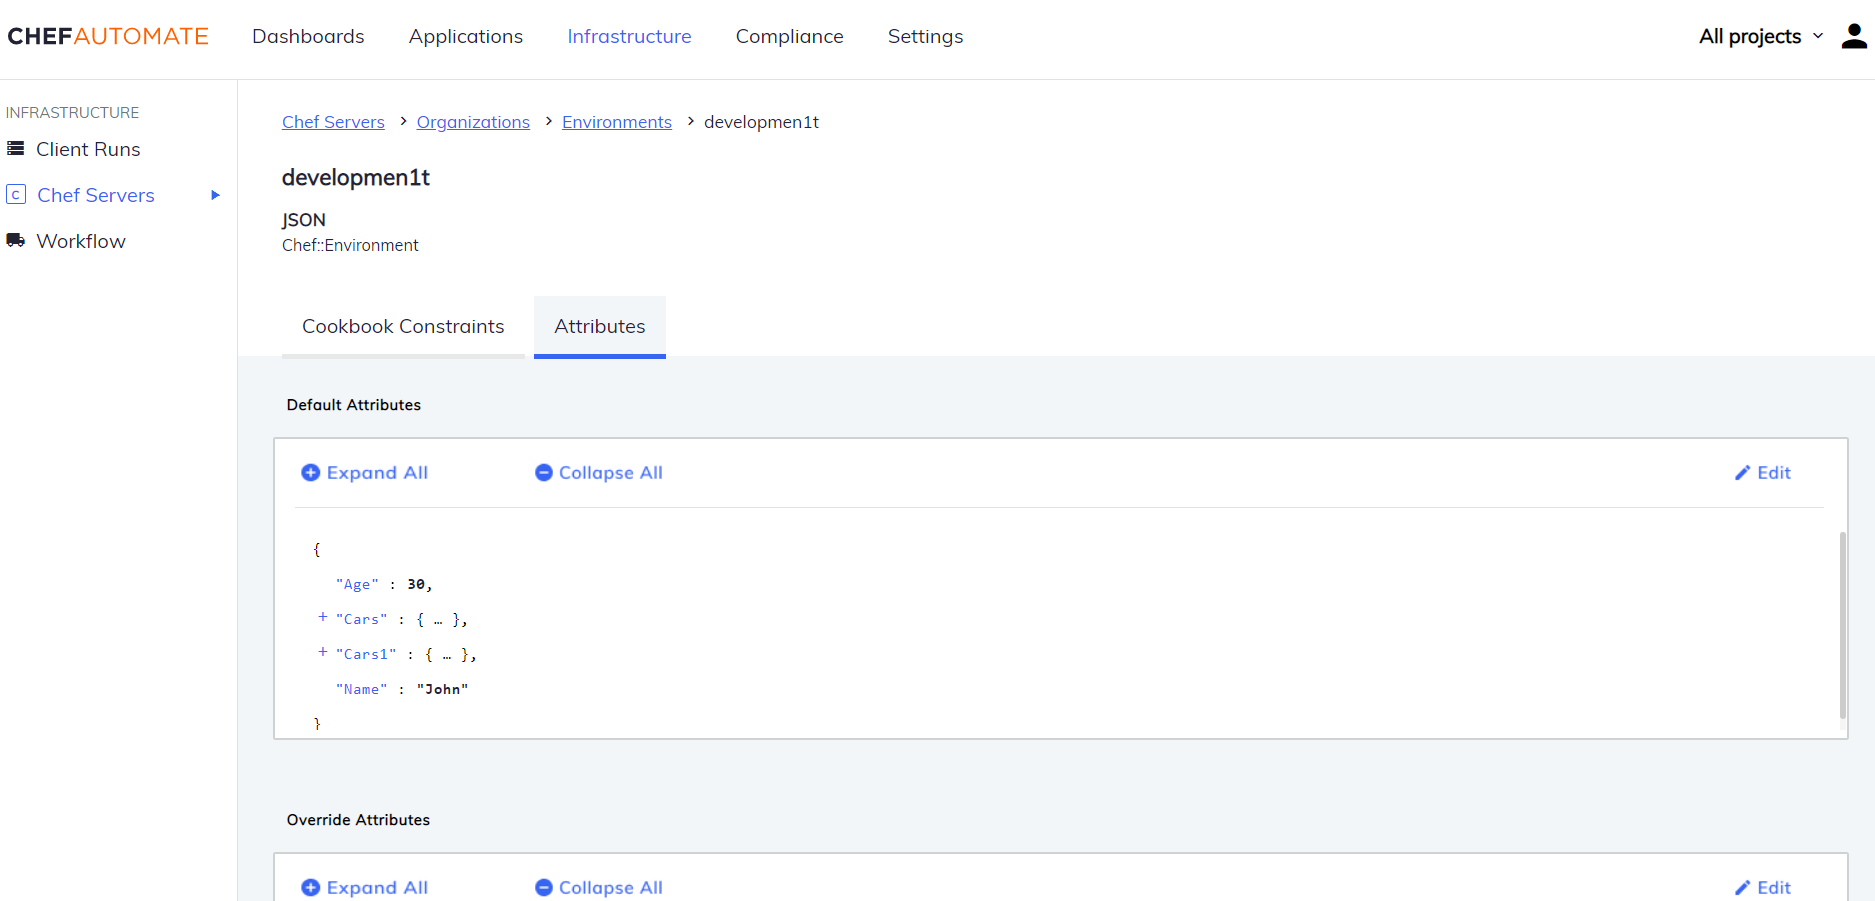
Details of an Environment
Select a specific environment to view that environment’s cookbook constraints and attributes.
Cookbook Constraints
The selected bar contains the list of all the cookbook constraints with Name, their Operator, and Version respectively. Select Edit to change the Cookbook Constraints.

Attributes
The attributes window shows all the default and overridden attributes. Select Expand All or Collapse All to view or hide the attributes. Select Edit to change the Default Attributes and Override Attributes.
Note
Delete an Environment
The Chef Infra Server lets you delete environments one at a time. Select Delete from the more information (three dots) icon on the far right side of the environment that you want to delete, as shown below:
Data Bags
Data bags store global variables as JSON data. Data bags are indexed for searching and can be loaded by a cookbook or accessed during a search.
Clients
Chef Infra Clients provide secure API access to the Chef Infra Server. Chef Infra Server UI lets you:
- Create a client.
- Search for a specific client from a list of clients.
- List out all the clients at one place.
- Reset a client key.
- Delete a client.
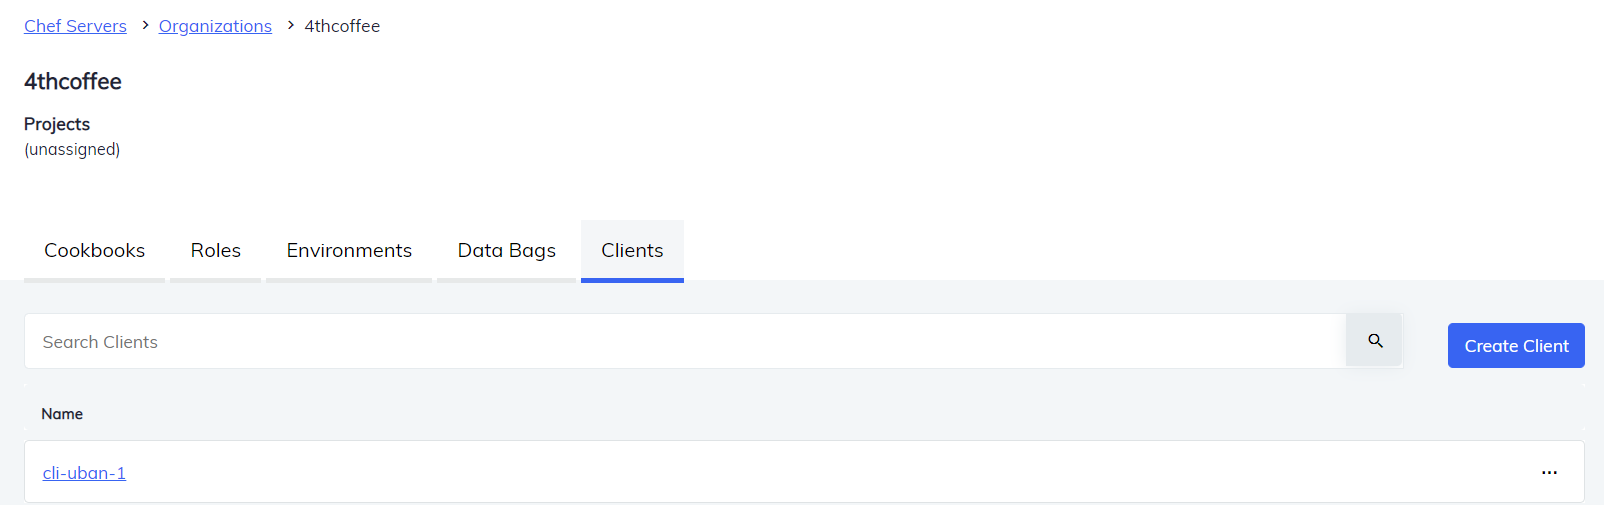
Create a Client
To create a new client, select Create Client.
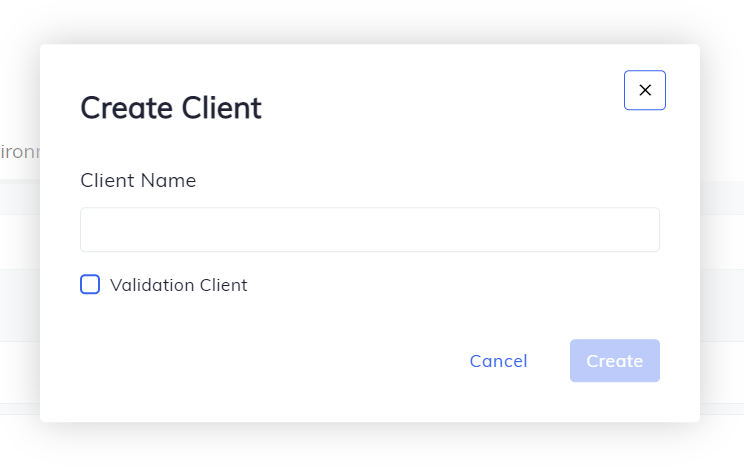
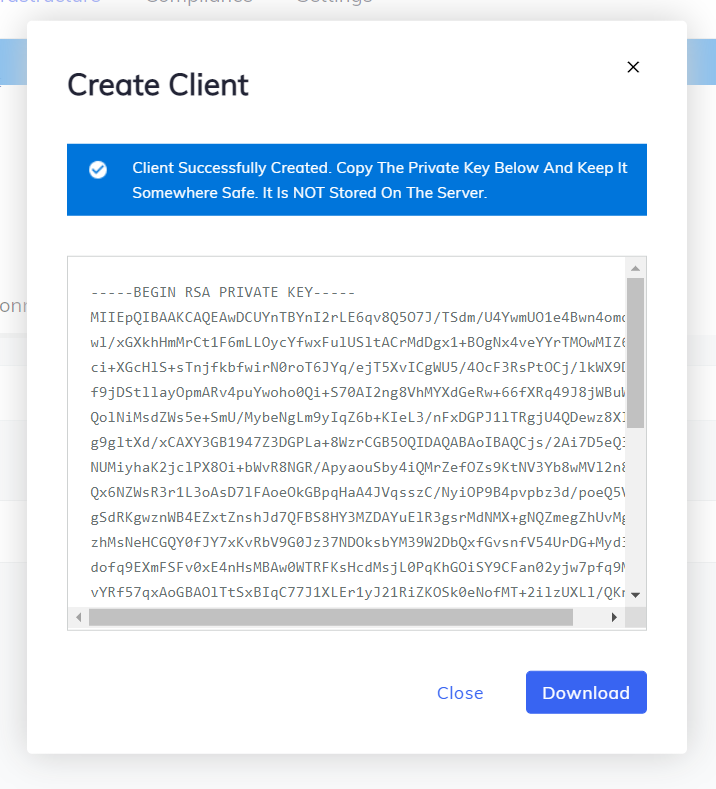
The Create Client button opens a dialog box. Enter the Client Name and select Validation Client to create a Validation Client. Select Create.
Selecting Create opens a dialog box which contains the Private Key of that particular client. Select Download to download the Private Key.
Search for a Client
Use the Search Clients bar to find an client from the list of clients. Entering the name of a client in the search bar returns clients matching your search criteria.
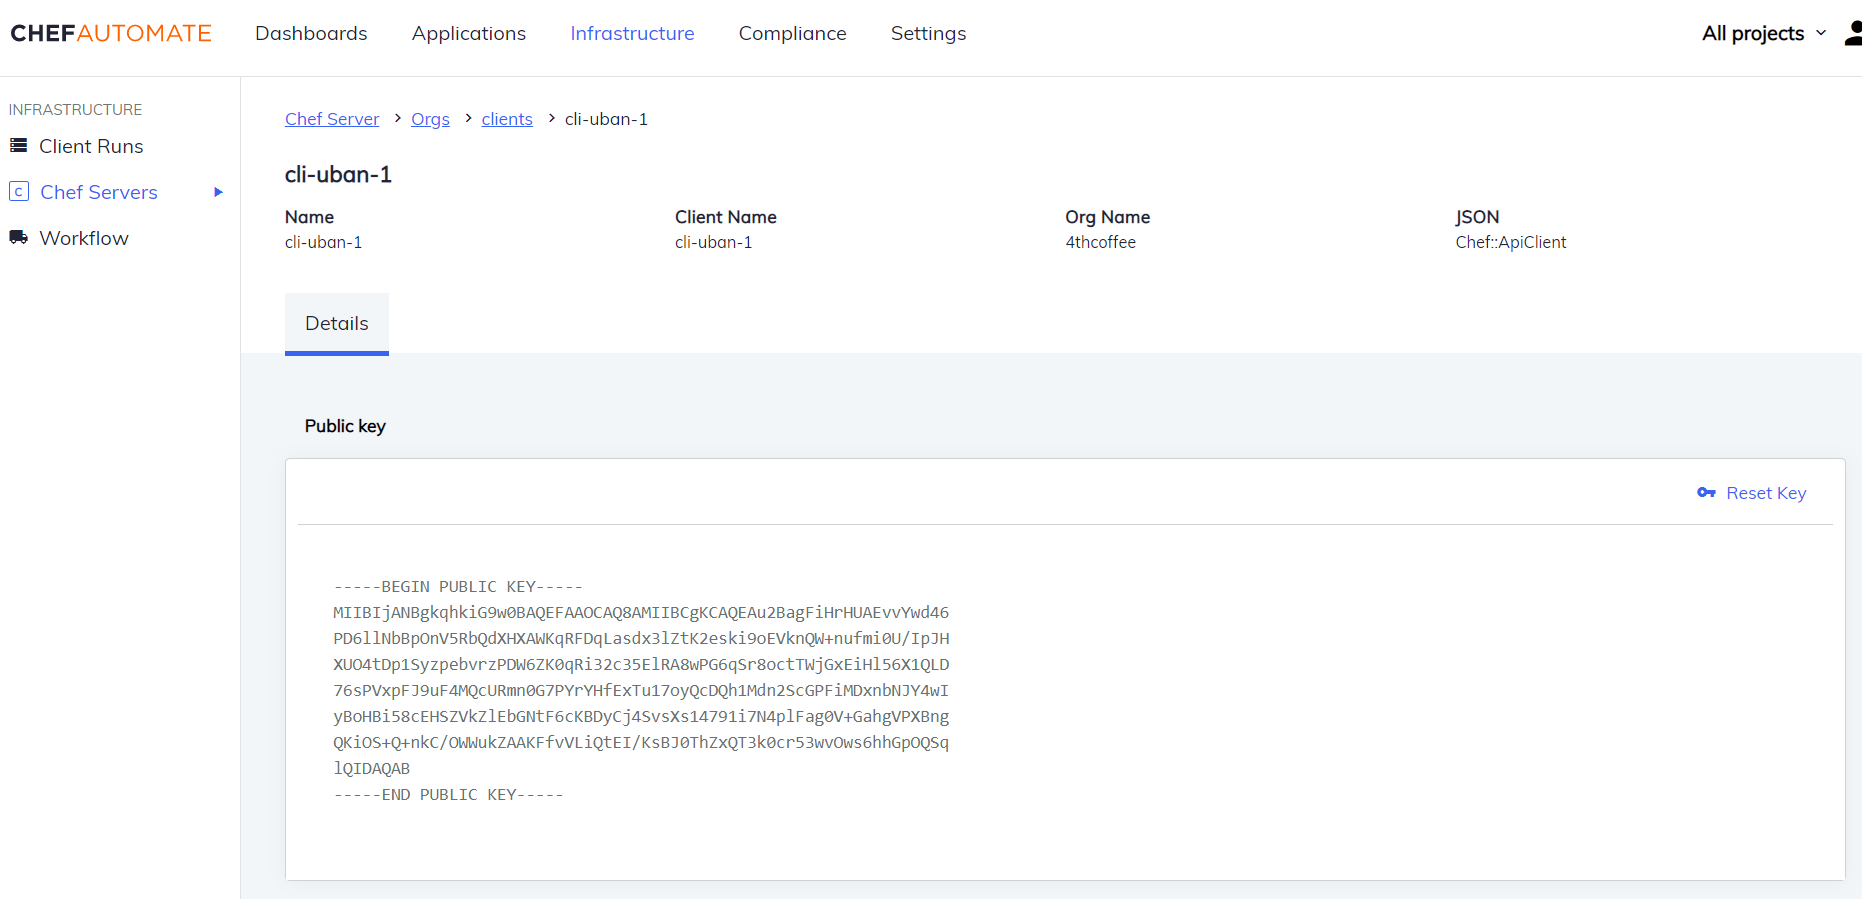
Public Key of a Client
Select the client to view the Public Key for that client. The Public Key of that client will be displayed in Details.
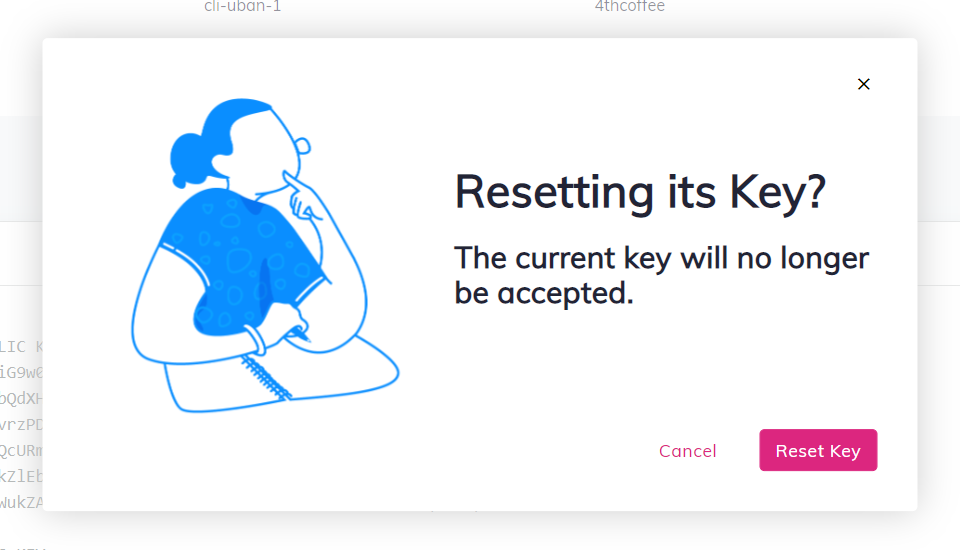
The Chef Infra Server lets you reset the Public Key using the Reset Key option. Selecting the Reset Key option opens an alert stating The current key will no longer be accepted.
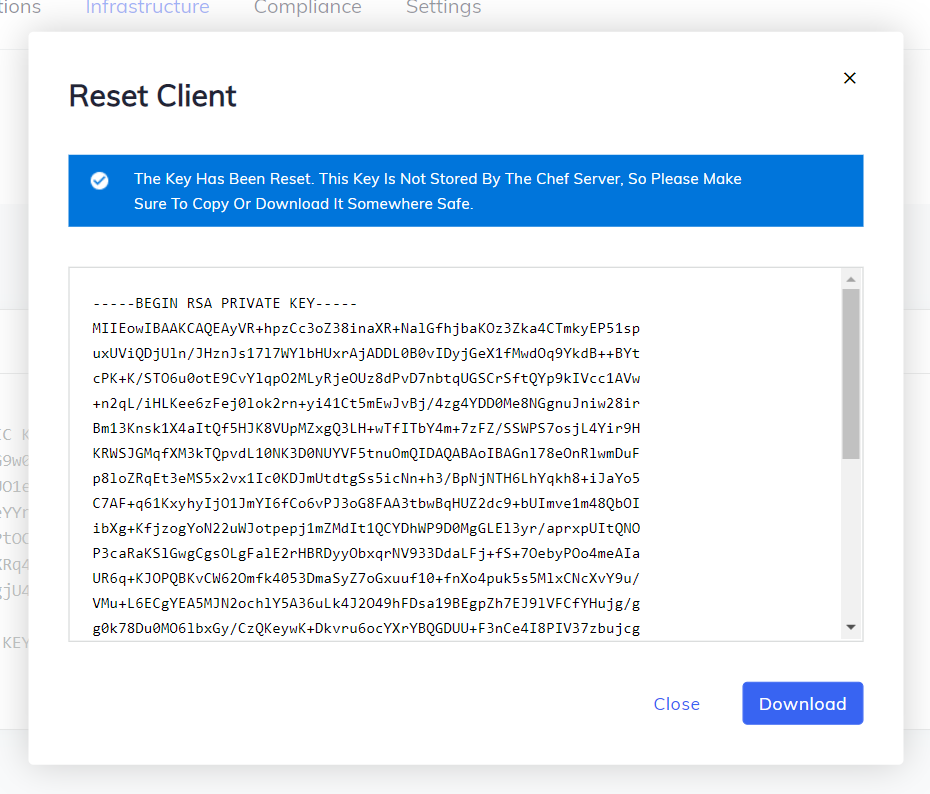
Selecting the Reset Key shown in the above image opens a new dialog box which contains the new Private Key of that client. To download the new Private Key, select Download.
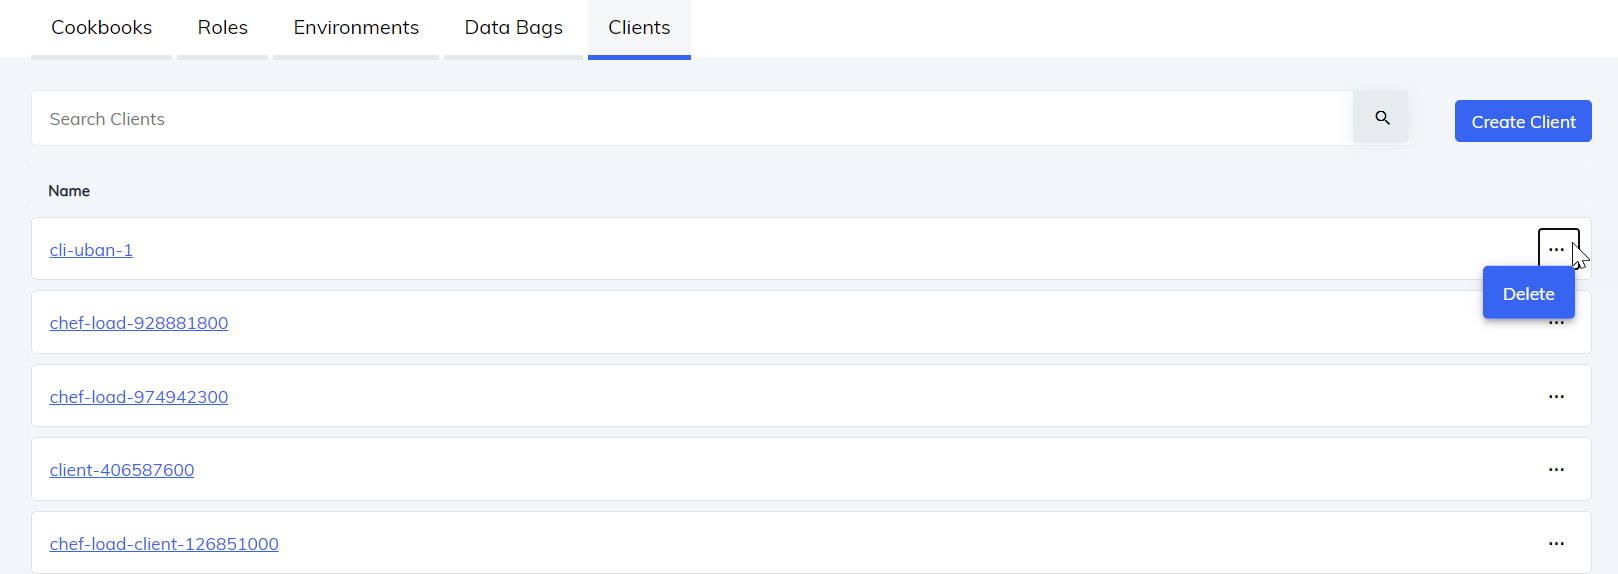
Delete a Client
Chef Infra Server lets you delete the existing clients one at a time. To delete a client, select the ellipses icon and then Delete, as illustrated below:
Troubleshoot
While fetching any objects like cookbooks, you might face an error Could not get cookbooks: organization 'no-org' does not exist, which means the provided organization does not exist on Chef Infra Server.

Create the organization using the knife command, knife opc org create or the Chef Infra Server CLI command, chef-server-ctl org-create, then add the Name, Projects, Admin User, and Admin Key to fetch the objects.
Was this page helpful?